Jupyter Notebooks have become an essential tool for data scientists, analysts, and anyone involved in exploratory data analysis or machine learning. While there’s a standalone web-based application for running Jupyter Notebooks, integrating this functionality directly into Visual Studio Code (VS Code) offers many additional benefits, such as an improved code editor, integration with other languages, and a unified development environment. In this blog post, I am excited to share my journey of setting up Jupyter Notebooks in VS Code.
Step 1: Install the Required Extensions
First, you need to install two key extensions for VS Code:
-
Python Extension: This is essential for Python development in VS Code. It provides features such as IntelliSense, linting, debugging, and more.
-
Jupyter Extension: This extension enables you to run Jupyter Notebooks inside VS Code. It allows you to create, view, and manage notebook files, and execute code cells just like in a standalone Jupyter environment.
Step 2: Install and Set Up UV
UV is a modern, fast Python package and project manager that simplifies dependency management and Python version handling. You can install UV using Homebrew:
brew install uvOnce UV is installed, navigate to your project directory and initialize a new UV project:
uv initThis command creates a pyproject.toml file that will manage your project’s dependencies and configuration. UV automatically handles virtual environment creation and management behind the scenes, so you don’t need to manually create or activate environments.
Optional: Set a Specific Python Version
If you want to use a specific Python version for your notebooks, create a .python-version file:
echo "3.13" > .python-versionUV will automatically download and use this Python version when you run your project. You can change this to any version you need (e.g., 3.11, 3.12, etc.).
Step 3: Install Jupyter and Dependencies
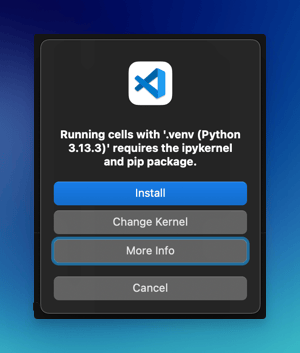
Jupyter relies on kernels to execute the code contained within a notebook. If you try to run the code in Jupyter notebook without it, you might see an error like below.
With UV initialized, you can now add Jupyter and its dependencies to your project:
uv add jupyter ipykernel notebookThis command updates your pyproject.toml file with the required dependencies and installs them automatically. You can also add other packages you might need for data analysis:
uv add matplotlib pandas numpyAfter adding dependencies, sync your environment:
uv syncSelecting the Kernel in VS Code
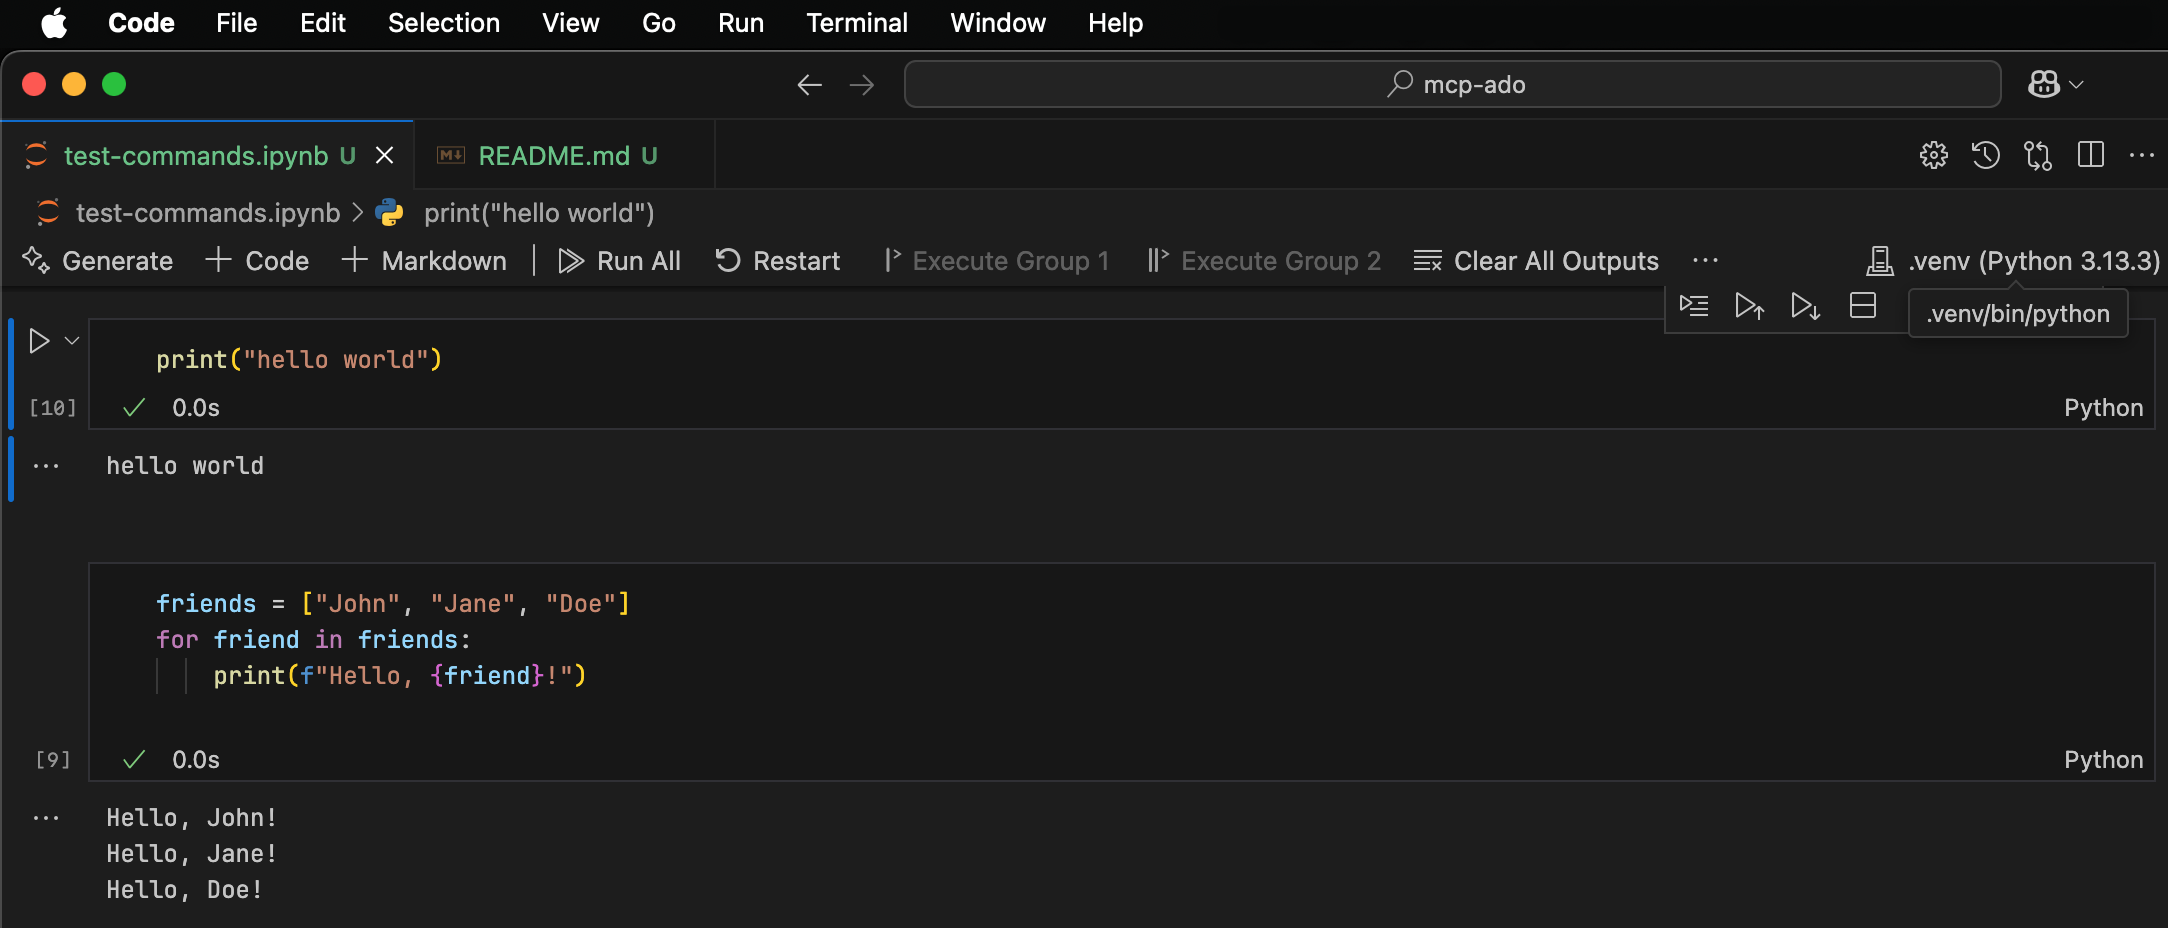
Once the dependencies are installed, you can select the kernel in your Jupyter Notebook by clicking on the kernel picker in the top right corner of the notebook interface. VS Code should automatically detect the UV-managed Python environment.

Tip: If you don’t see your UV environment in the kernel picker, try reloading VS Code or clicking the refresh button in the kernel selector.
Troubleshooting Environment Detection (Windows)
While UV handles environment management seamlessly on most platforms, Windows users may occasionally experience environment detection issues. This is a known limitation with how VS Code detects Python environments on Windows, particularly with virtual environments.
Common symptoms:
- Kernel picker doesn’t show your UV-managed environment
- “No Kernel” error persists even after running
uv sync - Environment appears, but kernel fails to start
Solution 1: Use Command Palette to Create Environment
If automatic detection isn’t working, you can create a virtual environment directly through VS Code, which ensures proper detection:
- Open Command Palette (
Ctrl+Shift+P) - Type and select “Python: Create Environment”
- Choose “Venv” from the options
- Select your desired Python version
This approach is more reliable on Windows because VS Code is involved in the environment creation process and immediately registers it in its settings.

Solution 2: Manually Select Interpreter
If you prefer to continue using UV or have an existing environment:
- Open Command Palette (
Ctrl+Shift+P) - Type and select “Python: Select Interpreter”
- If your environment appears in the list, select it
- If not, choose “Enter interpreter path…” and manually navigate to your environment’s Python executable:
- UV environments:
.venv/Scripts/python.exe(Windows) or.venv/bin/python(Mac/Linux) - Standard venv:
venv/Scripts/python.exe(Windows)
- UV environments:
Solution 3: Reload Window
After creating or syncing an environment, reload VS Code to force environment re-detection:
- Open Command Palette (
Ctrl+Shift+P) - Type and select “Developer: Reload Window”
This clears VS Code’s environment cache and rescans for available Python interpreters.
Environment detection issues are more common on Windows due to path handling differences and PowerShell activation mechanics. The Command Palette method is the most reliable approach if you consistently experience detection problems.
Step 4: Running Jupyter Notebooks
Now that you’ve installed the necessary extensions and tools, you are ready to start working with Jupyter Notebooks in VS Code.
Working with Notebooks Directly in VS Code
The beauty of the Jupyter extension for VS Code is that you don’t need to launch a separate Jupyter server or web interface. Everything runs natively inside VS Code!
- Open or Create a Notebook: You can create a new Jupyter Notebook from the Command Palette (
Ctrl+Shift+PorCmd+Shift+Pon macOS) by typing ‘Jupyter: Create New Blank Notebook’. - Load Existing Notebooks: Simply drag and drop your existing
.ipynbfiles into the VS Code editor or open them using the File Explorer. - Run Cells: Once your notebook is open, execute the code within by navigating to a cell and clicking the ‘Run’ button or using the shortcut (
Shift+Enter). - Interactive Widgets and Outputs: The Jupyter extension supports interactive widgets and rich outputs, providing a dynamic and engaging environment for data exploration.
Working with Different Python Versions
One of UV’s powerful features is easy Python version management. If you have a project that requires a different Python version, simply update your .python-version file:
# Switch to Python 3.11
echo "3.11" > .python-version
uv sync

# Or switch to Python 3.12
echo "3.12" > .python-version
uv sync
After changing the Python version, reload VS Code and select the new kernel in your notebook. UV will automatically download the specified Python version if it’s not already available.
Optional: Launching Jupyter Web Interface
While VS Code’s native Jupyter support is recommended for most workflows, you can still launch the traditional Jupyter web interface if needed:
uv run jupyter notebook
# or
uv run jupyter lab
Conclusion
Integrating Jupyter Notebooks with VS Code revolutionizes the way you can manage and interact with your data science projects. With UV’s modern project management capabilities, you get automatic Python version handling, seamless dependency management, and a streamlined workflow. Combined with VS Code’s professional-grade editor and the rich features of Jupyter, you can enhance productivity, streamline workflows, and consolidate various tasks within a single application.
Quick Reference
Here’s a summary of the key commands:
# Initial setup
brew install uv
uv init
echo "3.13" > .python-version

# Add dependencies
uv add jupyter ipykernel notebook
uv add matplotlib pandas numpy
uv sync

# Change Python version
echo "3.11" > .python-version
uv sync

# Optional: Launch web interface
uv run jupyter notebook
uv run jupyter lab
Happy coding!